So you’ve decided you want to back up your data. That is a great idea! I would say one of the most painful experiences of using a computer is to have your data go missing. Vacation and Graduation pictures, Resumes, even those love letters you wrote that one time. So what do we need to get started with a backup.
- A USB Hard Drive – Something like this will do just fine.
- A computer – Lets hope you haven’t misplaced it already!
- Windows operating system – Chances are you already are running windows, if you aren’t I would suggest looking into Time Capsule.
Thats it! Lets get started!
Before we dive in, lets open up your new USB Hard Drive and instert it into a USB port, you will get a popup on the screen, feel free to close it for now.
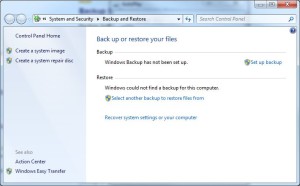
Step One: Launch your Backup and Restore program that comes with windows. This will allow us to set up what we want backed up and how often. Click on the link on the right that says “Set up backup”.
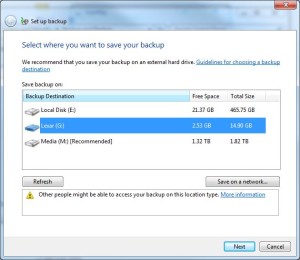
Step Two: Ok, so we have started to configure the backup, the program wants to know where we want to put the saved files. As you can see, my USB HArd Drive was found, its called Lexar and has a letter of G:. Click on yours and then click Next.
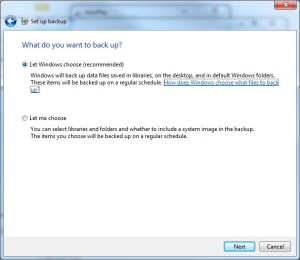
Step Three: Alright, so now that we have our storage, the software wants to know what we actually want to save. As long as you use your computer with defaults and save your documents in your user libraries (Documents, Pictures, etc.) you can select the “Let Windows choose”. I have selected the “Let Me Choose” to show you what the next screen will look like. Make sure to click Next to continue!
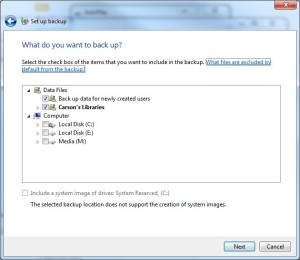
Step Four: As you can see, it shows my libraries already selected, and I have the option to back up specific areas of my hard drives if need be. I don’t want to right now so I left them unchecked. If you had data stored somewhere else, you can toggle the hard drives open with the triangle to the left of the name, and browse down to the specific folders. When you find them you can click on the check box beside them to have them saved as well. Click Next!
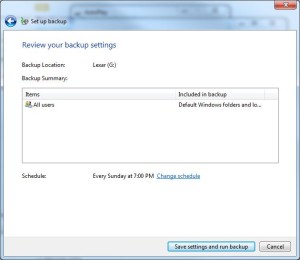
Step Five: That’s it! We did it! If you want to edit the schedule for backups, click on “Change Schedule” and select something that suits you. I prefer to do these late at night, as nothing should be going on with the computer while you are asleep! Make sure to plug in the USB Hard Drive before going to bed so the data can be saved!
Give yourselves a pat on the back, you did it, I am proud of you! If you did have some issues or are feeling like you cannot do this on your own (Don’t worry, a lot of people need help with stuff like this) feel free to send me an email and we can set up some one on one time to show you, or I can just set it up so you don’t have to worry!
Thanks for reading this tutorial, I am hoping to do more as time goes on, so keep checking in to the website or my facebook page!

Recent Comments